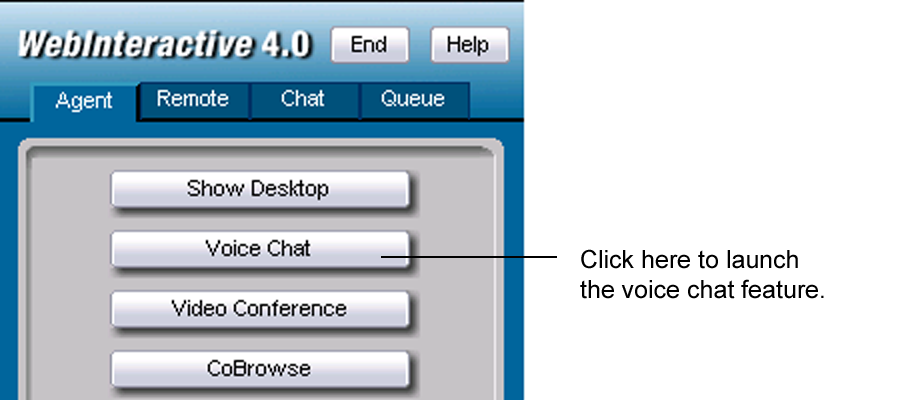
Click the Voice Chat to open a Voice Chat window on you machine.
When you, as the Agent open your Voice Chat window, a Voice Chat window will also appear on the customer's screen if they have a sound card installed. However, the customer cannot use their Voice Chat to speak until the Agent enables that option.
To use Voice Chat you must have a sound card and a microphone. The Voice Chat will run in full-duplex or half-duplex depending on the type of sound card you have installed.
The user can raise their hand, which will cause the user’s name to flash a flag on your Attendee list on your screen. To stop the name from flashing, right-click the user’s name and select Acknowledge from the menu.
You can see if you are broadcasting your Voice Chat to a Customer by checking your Attendee List.
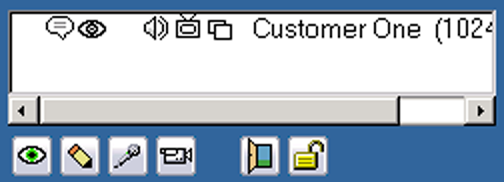
To activate
a customer’s microphone, click the microphone  next to the
Customer’s name in the Attendees list. Once activated, the Voice Chat
icon next to the user’s name turns green. Attendee List will show you
which user(s) have their microphone(s) enabled for speaking during the
meeting.
next to the
Customer’s name in the Attendees list. Once activated, the Voice Chat
icon next to the user’s name turns green. Attendee List will show you
which user(s) have their microphone(s) enabled for speaking during the
meeting.
The Voice Chat window consist of three main parts:
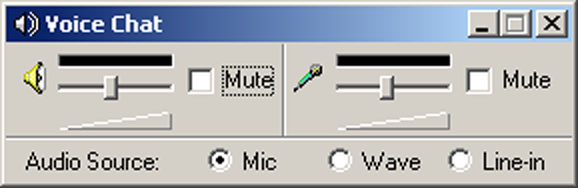
The left side contains the volume control and mute check box for the speakers. Check mute if you wish to disable the speakers.
The right side contains the volume control and mute check box for the microphone. If the microphone is enabled, you can check mute if you do not want to transmit through your microphone.
The bottom portion allows you to choose the audio source ( microphone, wave file or line-in).
If the right half is dimmed, it means that your microphone is disabled. The Agent can enable your microphone.
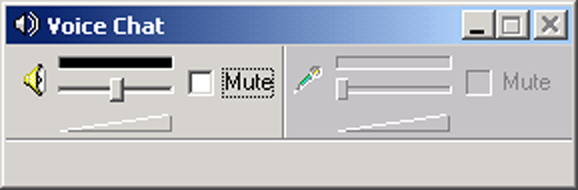
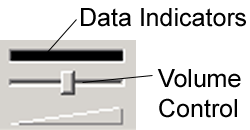
Above the volume controls there are sound data indicators.
The top left shows if audio packets are being received.
The top right indicates if your microphone is capturing sound.
If you are using a half-duplex sound card the Voice Chat window will appear with a TALK button on the bottom. If your microphone is enabled, you can press the TALK button to speak during the meeting.