To open your Video Conferencing window, click the Video Conferencing button in your control panel.
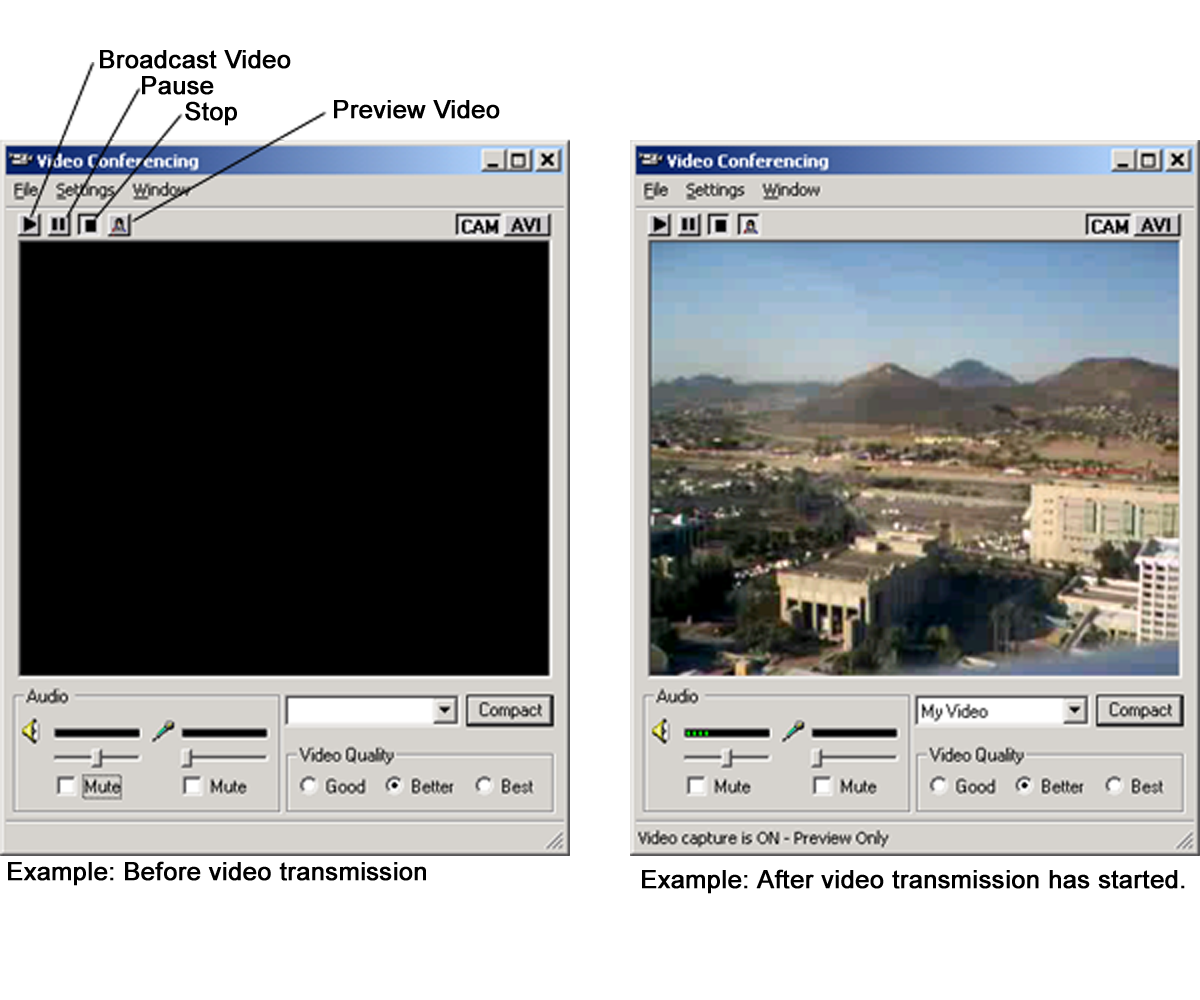
When you start Video Conferencing the monitor will be blank until you click the Preview Video button. It may take a second or two to initialize the camera. If your camera and microphone are properly installed, your video transmission will appear in your Video Conferencing monitor. The Preview allows you to make adjustments to your camera.
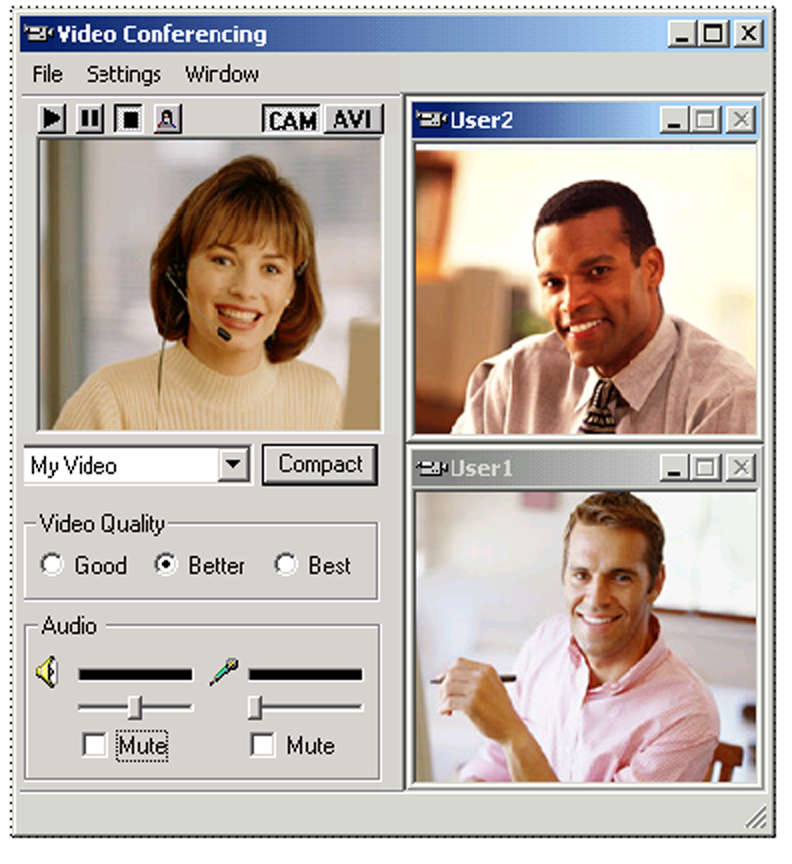
Check the Send Video box to start transmitting video. The example shows the Video Conferencing window before transmission. Once your preview is what you want displayed, click the Broadcast Video button.
In the Video Conferencing window you can adjust the Audio or Video Quality.
Audio - The audio controls allow you to adjust or mute the output of the speakers and the input of the microphone. If you place your cursor, for a moment, over the slider for the speakers or the microphone you will see a Tool Tip that tells you the current system preference set for your sound playback (speakers) or your sound recording (microphone). You can change these preferences in your Sounds and Multimedia Properties.
Video Quality - The default is Better. If you want the Best quality, select Best. However if the Internet is congested or if your computer or the receiving computer is having problems receiving data then it may help to set Video Quality to Good.
The Video Conferencing window has the following menu bar options:
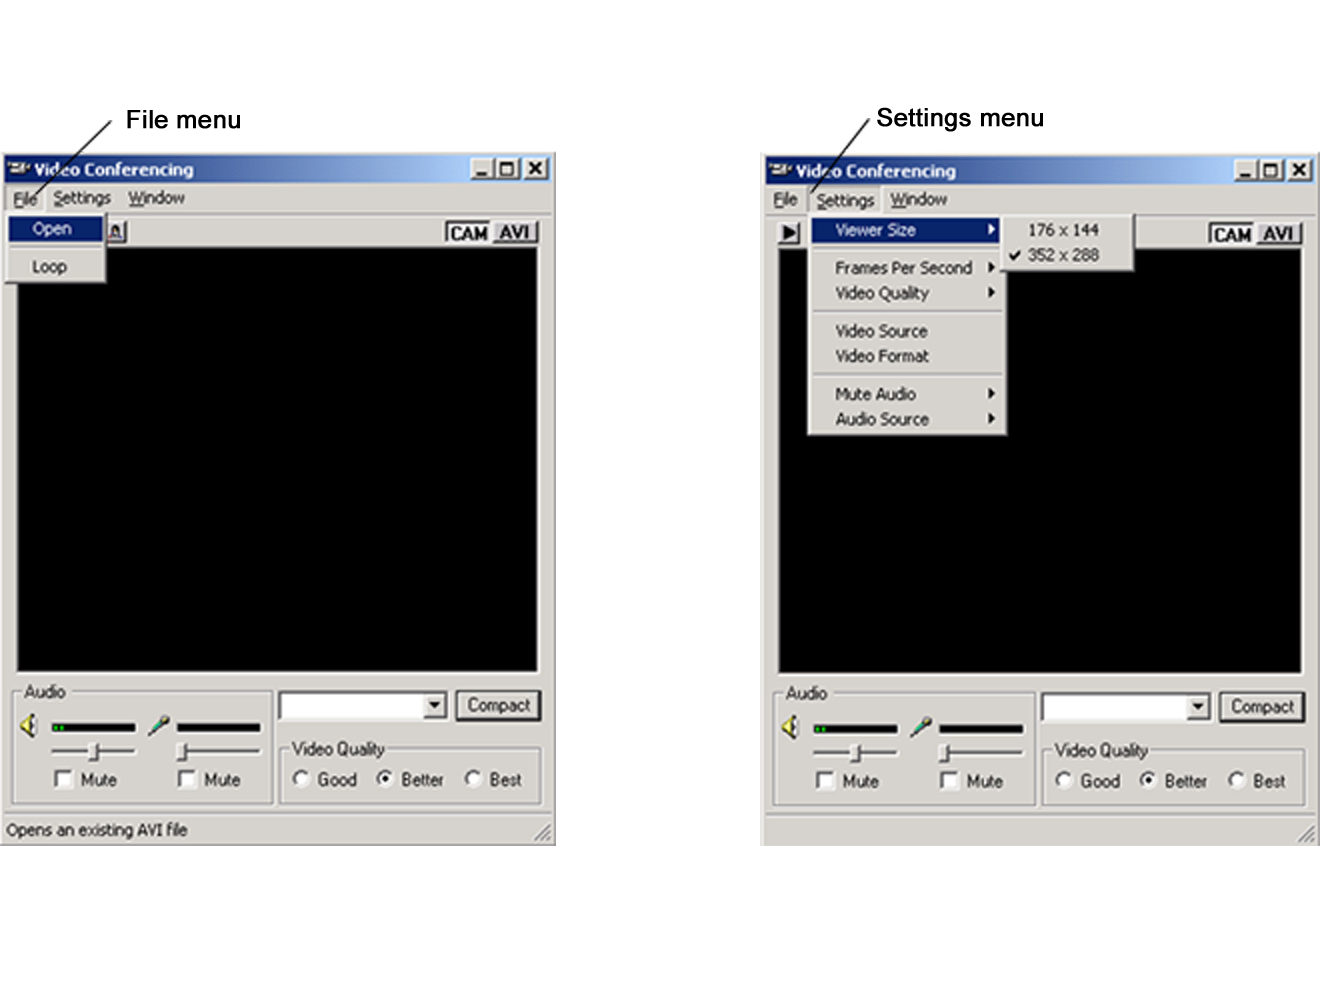
File Menu:
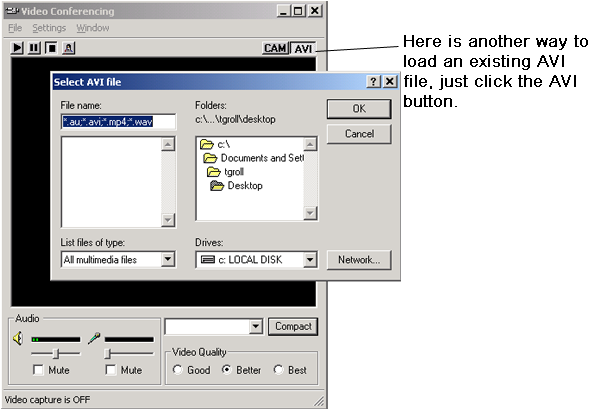
Open - Opens an existing AVI file.
Loop - Plays an AVI movie continuously.
Settings Menu\Viewer Size:
176 x 144
352 x 288
Settings Menu\Frames Per Second - The higher the number of frames per second the smoother the video motion. When there is a higher number of frames, more data is sent.
Settings Menu\Video Quality - Your choices are Good, Better and Best.
Settings Menu\Video Source - Video Source is grayed out until you start capturing video. To start capturing video, click the Broadcast button. Once you are sending video, you can select the Video Source option to make changes to your camera setting. The Video Source tabbed pages is usually different for each camera, because it depends on its’ driver.
If you have more than one video camera connected to your computer, the Capture Source page allows you to select the video camera you want to use.
Settings Menu\Video Format: Select the capture format.
Settings Menu\Mute Audio\Mute Speakers
Mute Mic - You can mute your microphone by selecting this option.
Audio Source: these are different sources of sound.
Mic - sounds coming in through your microphone input.
Wav - sounds that windows is playing.
Line-in - sounds that enter your computer through the line-in input to your sound card.
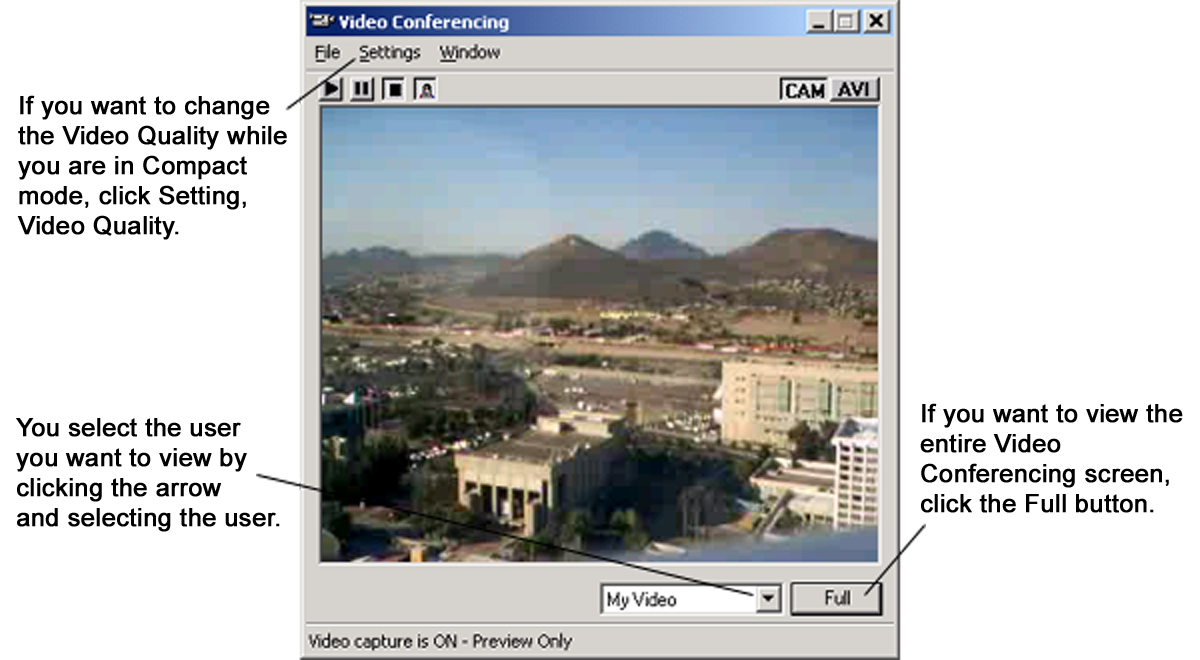
When you change the mode to Compact mode, your Video Conferencing window shows only one window. While in Compact mode, video data is received from only one user. You can select the user you want to view by selecting it from the drop down box.
The Agent can allow multiple session attendees to transmit video, in which case you will see a window for each person allowed to transmit video. The Cascade or Tile options allow you to easily rearrange multiple video windows into a Cascade or Tile layout. The viewer size in this example is 176 x 144.
You can click File and then Open to open an existing AVI file.